Headlines
- What’s the difference between Case Hardening and Through Hardening?
- The three-step process for drilling completely accurate and smooth holes.
- What it takes to supply top motorsport teams.
- Precision Engineered Solutions That Reduce Production Cost and Time.
- How composites, and an unlikely companion, make hypersonic flight a possibility.
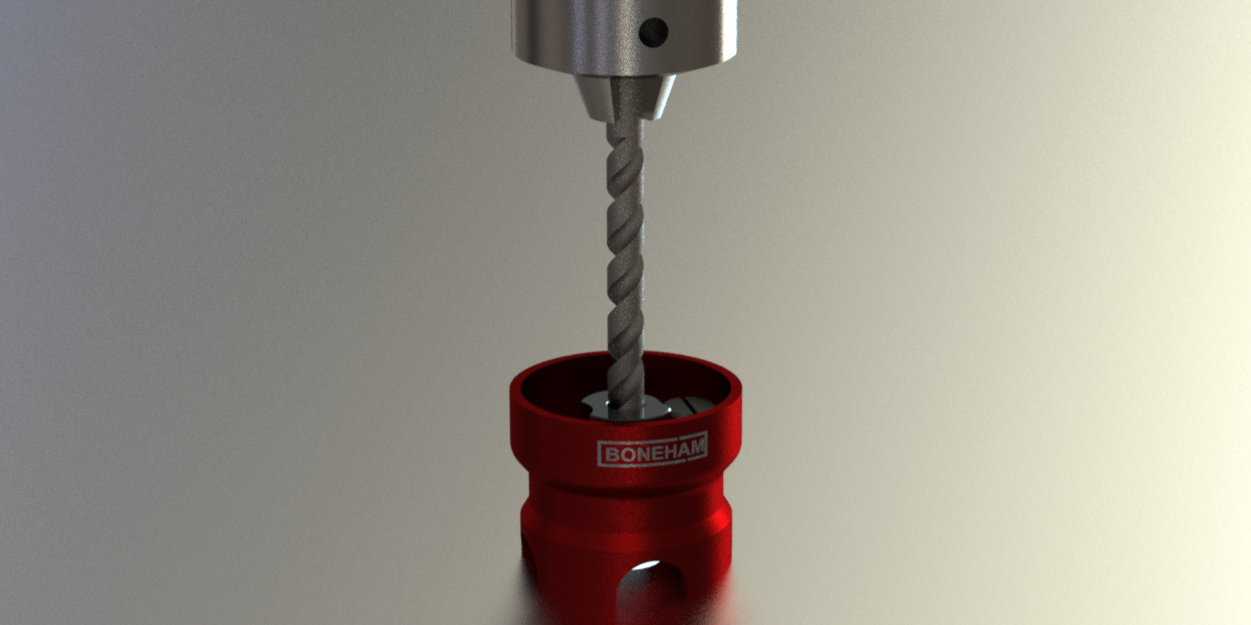
The three-step process for drilling completely accurate and smooth holes.
13 December 2023
Drilling accurate holes is one of the most important parts of manufacturing and engineering. An accurate hole with an exact diameter helps speed up work piece alignment and ensures the final product is high quality. To achieve the ultimate hole, just follow this (relatively) simple three step process. But before getting stuck into the three steps, you should take to drill the perfect hole, you should ensure you follow these standard procedures.
As part of this three-step process, the drilled hole should be slightly smaller than the desired diameter. It’s common for the drill size to be reduced 2% - 4% from the desired hole diameter. This allows for the third and final step of the process to make a truly circular hole with an exact diameter.
Reaming is faster and more stable than boring and grinding, making it a go to when efficiency and accuracy are key. Plus, it’s ideal for low volume repair operations where a rapid turnaround is required.
Initial considerations
Get the correct drill bits
- Ensure you have sharp and hard drill bits and reamers suited to your workpiece material to avoid putting too much pressure on the workpiece when cutting. Check out this useful drill bit finder from Performacut to get your drill bit selection perfected.
Secure your workpiece properly following the 3-2-1 principle
- Use location pins and clamps to keep your workpiece locked down during the hole cutting process. This prevents any wobbling or sliding that may occur and compromise the accuracy of the hole.
The three-step process for drilling
Step 1: Piloting
Piloting is used to create an accurately located entry point for fasteners or larger drill bits to enter the workpiece. By making a consistent surface, piloting prepares the workpiece for the drilling process by breaking the edge to reduce the chance of damage. Pilot drilling may use a standard twist drill or, when used specifically for accurate hole location, a short and stiff centre drill. Centre drills are chamfered to further prevent damage to the workpiece.Step 2: Drilling
Drilling is the cutting of a hole with a circular cross-section in a solid material. Unlike piloting, drilling cuts a hole in the workpiece to the desired depth. A hole that is drilled has a slightly rough internal finish. This means that the concentricity of the internal diameter is not as high as it could be. So, there may be difficulty getting bushes and dowels to properly fit the hole.As part of this three-step process, the drilled hole should be slightly smaller than the desired diameter. It’s common for the drill size to be reduced 2% - 4% from the desired hole diameter. This allows for the third and final step of the process to make a truly circular hole with an exact diameter.
Step 3: Reaming
Reaming is the process of slightly widening and professionally smoothing an existing hole to an exact diameter. It’s essential in metal working as it provides the precision needed for workpieces to be accurately located and aligned.Reaming is faster and more stable than boring and grinding, making it a go to when efficiency and accuracy are key. Plus, it’s ideal for low volume repair operations where a rapid turnaround is required.